The latest version of cPanel backup has support for automatically backing up your website to multiple cloud providers. Before reading this blog post, make sure you take a look at my previous post, how to backup a cPanel website. Backing up to the cloud is only possible in the latest cPanel backup configuration, not in what they now call their legacy backups. So if you haven’t configured your backups in a while, now would be a good time.
As mentioned in my previous post, you can and should specify daily, weekly, and monthly backups with different retention periods. This is even more important when directing those backups to the cloud, because each of those backups will take up space, and keeping weekly backups longer and monthly backups even longer gives you a much longer retention period without taking up so much space.
The databases on my two websites are not terribly big; seven daily backups, four weekly backups, and three monthly backups only take up 14 GB of space. But guess how much that costs me in Amazon. $.19 per month. Yes, you read that right. My backups cost me $.19 per month. If your website is 10 times bigger than mine, it will cost you a $1.90 per month. How awesome is that?
Backing up to Amazon S3
The easiest thing to do is to backup your cPanel website to Amazon S3. You probably already have one of the things you need to make this happen: an Amazon account. Just click on the Amazon Simple Storage Service (S3) website and login with your Amazon account. (Or if you want, use a separate account for this purpose.)
If this is your first time logging into S3, it will require you to give your full contact information and agree to the AWS customer agreement, as well as entering a valid credit card for billing. The service will then ask you to verify your phone number and select a support plan. I selected Basic, which is free. Now you can click Sign in to Console. Search on S3 and follow its link.
Setup Amazon Bucket
Once you’re at the Amazon S3 Control Panel, click Create bucket. You then need to come up with a name that is unique across all buckets in Amazon. The name doesn’t really matter; it just needs to be unique. If you pick a name someone else has picked, you’ll get a message like this:

Once you pick a valid bucket name, you need to select the region. This should be a region other than the one your website is located in. (The region will also affect your pricing. Consult Amazon’s S3 pricing website for details.) Clicking Next will take you to a page that talks about options that you can ignore for now, such as versioning. CPanel will automatically maintain the versions that you’ve specified. Just keep clicking Next until you get to Create bucket, and click that.
Create Amazon User
Now you need an access key, which allows a particular user to log in to S3. To do this, you’ll need to create a user and a group, give that group permission to write to S3, then assign that user to that group.
To do this, search IAM in the S3 console and click on it to be taken to the Identity and Access Management (IAM) console. The first thing you can see is that it recommends deleting your root access keys, because they provide unrestricted access to your AWS resources. You can and should do that later. Right now you’re going to create a special user just for backup. Click on the down arrow followed by Manage Security Credentials.

A message will pop up that again warns you about deleting your Root Access credentials. Click on Get Started with IAM users.

Click on Add User. Create a username and click on programmatic access. Click next: Permissions.

You now need to create a group of users (even though it will only have one user in it), give that group permissions, and then assign it to this user. Click Create Group. Call the group whatever you want and search on S3, then select AmazonS3FullAccess.

Now click Create Group. It will automatically check this group’s name in the Add User screen to add this user to that group. Click Next Review, and Create User.

You should now see a screen that lists the user, and a column called access Key ID and secret access key.

You need to click Show to see the secret access key. (Don’t worry, the access key you see here is no longer associated with an account.) Now you have everything to configure your Amazon S3 backups.

Configure Cpanel Backups to go to S3.
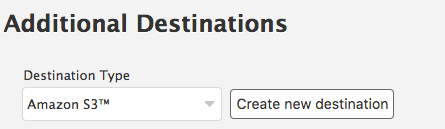
In the WHM console, click Backup Configuration, and scroll to the bottom looking for additional destinations. Select Amazon S3 in the Destination Type and Create new destination.
In the configuration page for this destination, give it a name and select the box that says transfer system backups to destination. (It says you should only do this if your connection is encrypted. Amazon S3 is an encrypted connection.)

Enter the name of the bucket, access Key ID, and secret access key from the previous section, followed by save and validate destination. Assuming you did everything correct, it should appear as an additional destination at the end of your backup configuration. Click Save Configuration and you’re done. Backups will automatically be transferred to Amazon S3 as soon as they are done, and older backups will automatically be deleted from S3 once they have expired. (You might want to run a test backup to see if it works.)
One final choice is whether or not to leave the backups on the local drive for quick restores. Feel free to do that if you have the space. To do that, just click Retain backups in the default backup directory.

What about Glacier?
I initially thought I would send my backups to Glacier. I make backups far less often than I restore backups (hopefully), and that sounded like it was perfect for Glacier. However, Glacier has a minimum retention period of 90 days. So while it is less expensive per gigabyte, it actually would cost me more money since it would force me to keep all backups for 90 days. Therefore, all of my backups go directly to Amazon S3. If you’re backup configuration is different, and the 90 day minimum policy isn’t a problem for you, you can create a lifecycle policy in Amazon to automatically transfer your S3 backups to Glacier after 30 days. (There is no way to send cPanel backups directly to Glacier.)
W. Curtis Preston (aka Mr. Backup) is an expert in backup & recovery systems; a space he has been working in since 1993. He has written three books on the subject, Backup & Recovery, Using SANs and NAS, and Unix Backup & Recovery. Mr. Preston is a writer and has spoken at hundreds of seminars and conferences around the world. Preston’s mission is to arm today’s IT managers with truly unbiased information about today’s storage industry and its products.
